Guides
Part of Visible mending: what a beginner should know before the first repair
A weekend practice plan for learning hand mending on scrap cloth
Two days of hand mending practice on scrap cloth before you touch a garment you care about, with a stretch test, four exercises, washing and one real repair.
The usual way people learn mending is to repair the first thing that tears, which means learning on a garment they care about while making every beginner mistake. Two days on scrap cloth first is a better trade. This plan assumes a needle, thread, scissors, and a bag of old clothes cut into squares.
What to take away
- Practice on cloth cut from the same kinds of garment you wear, not on quilting cotton. Fabric behavior is the lesson.
- Cut your own damage. A hole you made is one you can make again when a stitch goes wrong.
- Wash every practice piece before judging it. Puckering and shrinkage only appear afterward.
- Two days gets you to competent, not to good. Competent is enough to stop ruining garments.
Saturday morning: fabric behavior
Before any stitching, test what your cloth does. Utah State University extension guidance on considerations for knit fabrics gives a stretch test that takes two minutes. Fold the fabric on the cross grain away from the selvage, mark a four inch section with pins, and stretch it as far as it goes easily.
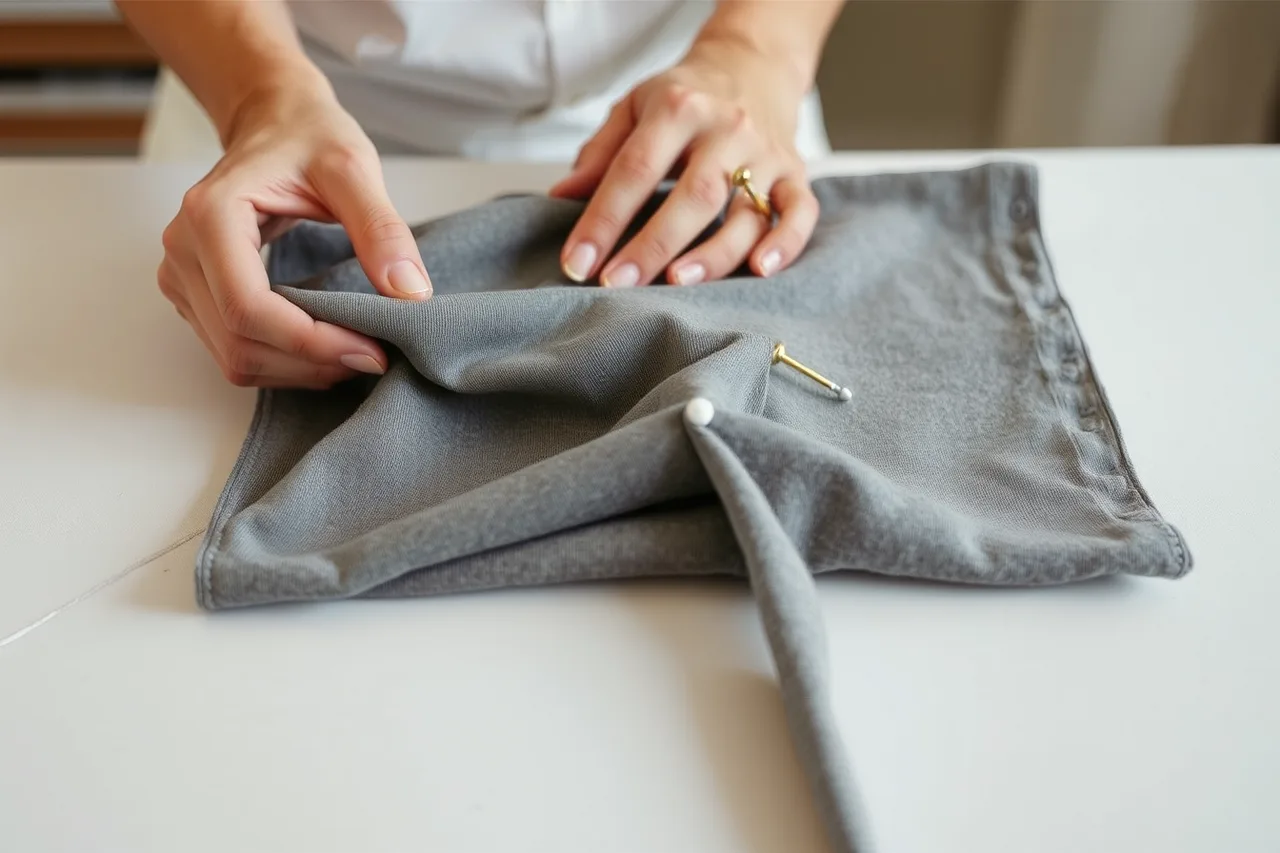
Each additional inch is another 25 percent of stretch, so five inches is 25 percent and six inches is 50 percent. Let it relax and check that it returns to four inches. Fabric that does not recover will sag in wear.
Do this on three different fabrics. The numbers tell you why the same repair behaves differently on a t-shirt and on a shirt.
Saturday afternoon: four exercises
Work each one twice on scrap, then stop.
- A straight running stitch line, six inches, aiming for even spacing rather than small stitches.
- A woven darn over a half-inch hole, warp threads first, then weft threads over and under.
- A patch applied behind the damage, stitched half an inch out into sound cloth.
- A patch applied on top, edges turned under, stitched down.
By the second attempt at each you will notice the tension problem: stitches pulled tight look neat while you work and gather the fabric when you let go.
Sunday morning: wash and assess
Wash the practice pieces the way you wash clothes, then look at them again. Puckering, thread shrinkage and edge lift all appear here and nowhere earlier.
Read the care instruction on the garment the scrap came from. The requirements those labels follow are set out in 16 CFR 423.6, which requires a washing or drycleaning instruction and specifies temperature wording. A label need not state a water temperature if regular use of hot water up to 145 degrees F will not harm the product.
Sunday afternoon: one real repair
Pick the least valuable damaged garment you own and repair it properly. Photograph it before and after. Note the thread and stitch used. Then put it into normal rotation and look at the repair again after five washes, which is where the real feedback is.
If a tool feels wrong during this, the comparison of tool types explains what each one is for. The reasoning behind stitch placement is worth rereading once you have felt the problem rather than only read about it.