Guides
Sweater mending how it works: a step-by-step guide
Sweater mending how it works: secure live loops, match repair yarn, work a Swiss or woven darn, and block the sweater flat.
Sweater mending how it works: a hole in a knit differs from a hole in woven fabric. Knitted fabric is one continuous loop structure, so a broken loop can run. Mending a sweater means stopping that run before anything else. The difference reorders the whole job.
What to take away
- Secure the live loops first. Everything else waits until the hole cannot grow.
- Match the yarn by fiber and thickness. Yarn heavier than the garment distorts the knit around it.
- Work flat and unstretched, on a support that holds the shape without tension.
- Block the area when you finish, or the repair will sit proud of the surface.
Step one: stop the run
Use a fine, contrasting sewing thread, such as silk or fine polyester, and a fine hand-sewing needle that passes through the loops without splitting their yarn. Find the loops at the top and bottom edges of the hole. Secure them with a few loose running stitches through intact loops, like a lifeline, and leave the thread tails accessible so you can remove it later. Do this before you handle the garment again. Every extra minute of unsecured knitting gives a loose loop another chance to drop.
Then trim only the loose fiber ends, not the loops themselves.
Step two: choose the yarn
Fiber first, thickness second, color last. A wool sweater takes wool. The hard case is a cashmere or mohair garment, where the label term is regulated and carries real meaning.
For a practical match, start with leftover sweater yarn if available. Otherwise, check the garment’s fiber-content label and choose yarn with the same fiber content. If the garment is unlabeled, a burn test on a single loose fiber removed from an inconspicuous spot can help distinguish animal fibers, which smell like burning hair, from many synthetics, which melt; blends can make the result inconclusive. Test only a removed fiber over a fireproof surface, never on the garment.
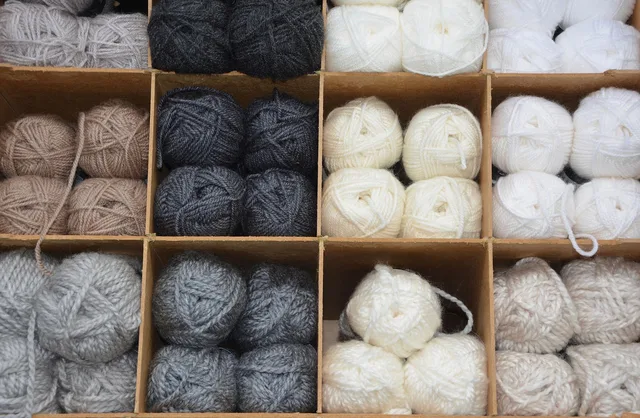
To compare thickness, lay the candidate strand beside the original and wrap both around a ruler without gaps or overlaps to compare wraps per inch (WPI). Choose a similar thickness, then knit a small swatch if possible and compare its gauge and drape with the sweater. Yarn-weight labels such as fingering, DK, and worsted are useful cross-checks, but direct comparison is more reliable. Choose color last.
The Federal Trade Commission’s Wool Products Labeling Act rules, commonly called the FTC Wool Rules, govern the use of the terms mohair and cashmere. Cashmere may only be claimed for the fine dehaired undercoat of a cashmere goat. The average fiber diameter must not exceed 19 microns. No more than 3 percent by weight of the fibers may have average diameters above 30 microns.
So cashmere repair yarn behaves differently from wool: it is finer. Substitute ordinary wool into a cashmere sweater and the repair feels harder than the fabric around it.
Step three: support the work
The National Park Service leaflet on internal supports for buckskin clothing storage concerns another material; for sweater mending, the useful principle is to support the work without stretching the knit.
For mending, use a rolled towel or a darning support under the hole, never a hoop.
Step four: darn following the structure
Two options. A woven darn lays threads across the hole in a grid. It is faster. A Swiss darn follows the path of the original knitted loops. It is slower and nearly invisible when you use the same yarn.
- Small hole, matching yarn availableSwiss darn
- Larger hole, or deliberately visiblewoven darn
- Very large areaknitted patch grafted in
Swiss darn: Thread matching yarn through a blunt yarn needle. Follow the rows and columns of the knit, recreating the missing V-shaped stitches one row at a time. Pick up intact loops at each side of the hole, keep the new stitches the same size as their neighbors, and weave the yarn ends into sound stitches.
Woven darn: Anchor the yarn in sound fabric beyond one edge of the hole. Lay parallel strands across the opening, extending them into sound fabric on both sides. Weave crosswise strands over and under the first set, alternating the pattern on each pass. Secure the ends in intact stitches and keep the grid relaxed so it does not pull the edges together.
Step five: block it
Wet the repaired area and press out the water without wringing. Lay the sweater flat and shape it to its original measurements. Let it dry fully before you move it. Blocking makes a darn settle level with the fabric instead of standing above it.
The support you work on shapes the result, so the work surface and light are worth setting up properly. If the sweater came to you unlabeled, the same rules on unknown fiber apply as to any salvage.
Common questions
Can I use a sewing needle on a sweater?
What if I cannot match the yarn?
Should I wash the sweater before mending?
Why does my darn pucker?
In this guide
- Hoop versus flat support for sweater mending, compared honestlyWork surfaces for knitwear repair: why knits need a flat unstretched support rather than a hoop, what to put under a sweater while you work, and why the floor.
- Sweater mending with reclaimed wool and unlabeled knits: what you are holding, explained properlySweater mending makers: how recycled wool is described on labels under FTC rules, why it behaves differently, and how to test unlabeled knits.
- Buying sweater mending supplies first, and what can waitA short list for knitwear repair: blunt yarn needles, a rounded support, and yarn matched by fineness, with a note on what wool label numbers actually mean.
- 4 things worth knowing about costing sweater repairKnitwear repair supplies are cheap and the losses they prevent are not. How to count both, and what pest treatment actually costs in time and risk.
- Which moth-control habits actually protect a small sweater mending setup?Sweater mending setup: storing and repairing knitwear in a small home, what clothes moths actually eat, why cleaning matters more than repellents.